Just another free Blogger theme

BUSINETWORK. Powered by Blogger.

Featured Posts

Sunday 31 July 2016

GTBank Internet Banking allows Guaranty Trust Bank customers in Nigeria and beyond, to conduct a range of financial transactions through the GTBank website, thereby making it easy for customers to access banking services without having to visit a branch offfice of GTbank.

If you're a GT Bank account holder and you sign up for GTB internet banking, you will easily experience banking from the comfort of your home, at work or abroad.

Benefits of GT Internet Banking

  • Easy access to all your GTB account(s) from anywhere in the world.
  • Online real-time account monitoring facility.
  • Convenience of conducting banking transactions from comfort of home/office.
  • Guaranteed security for all your online transactions.
  • Easy Access to bank information and products.
  • Effective, cheaper and easier way for our customers to communicate with banks.
  • Allows 24/7 access to account.

GTBank Internet Banking Registration Process


To get started, you have to sign up for GT internet banking by filling the GTB internet banking request form. You can download GTBank internet banking form online or walk in to the nearest GTBank branch office to fill the form. 

The form can either be scanned and e-mailed to internetbanking@gtbank.com OR submitted at any Guaranty trust Bank branch.

In the request form, you will be required to provide your GTBank account number & name, your email address, the accounts to be profiled for internet banking, the internet banking services to be profiled on your accounts etc

Once your registration has been approved, your account will be profiled and your GTBank internet banking credentials will be sent to your account's email address. 

How To Get GTBank Internet Banking User ID and Password


Your GTB internet banking ID and password will be sent to your email once your account has been profied for the service. 

If you have not received your login details, please visit www.gtbank.com and click on the ‘’REGISTER’’ button on the internet banking tab or dial *737*6*5# from your registered phone number with the bank.

*Kindly note that the Password must be changed within 2 hours of receiving same.


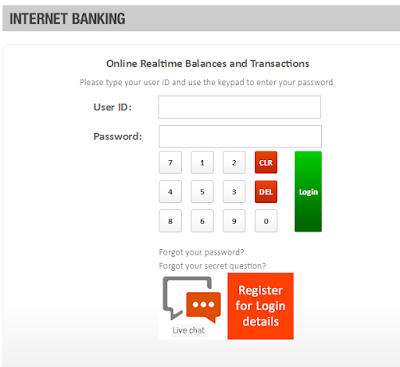
How To Login To GTBank Internet Banking


Please visit www.gtbank.com and click on "Login" button if you want to sign in to GTB internet banking. 

gtbank internet banking sign in


You will be required to enter your GTB internet banking user id and password. 


gtbank internet banking user id and password page

Type in the ID, use the keypad to enter your pasword, then click the "login" button. 

If successfully logged in, you will see your GTBank internet banking dashboard where you can check your account balance, transfer money, pay bills etc

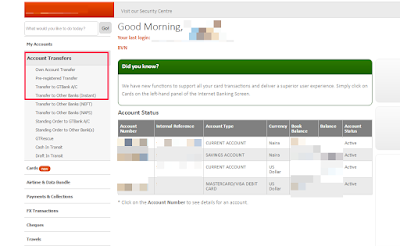
How To Transfer Money Using GTBank Internet Banking


With GTBank Internet banking, you can transfer money between your various accounts e.g. from current account to savings account; to any other GTBank account and to other Nigerian bank accounts. 

Via the "Account Tranfer" tab on the sidebar, you can use the "Own account tranfer" link to transfer between your accounts. Right there, you will also see the links to transfer to another GTBank account and other banks (Instant). 

gtbank internet banking dashboard


If you have a GTBank dom account on your Internet banking profile, you can as well transfer US dollars to GTB and not gtb accounts via "FX Transactions" tab. 

The video below will guide you on how to transfer money using GTbank internet banking :


Kindly note that a transaction code will be needed to complete some transactions via GTB internet banking eg Transfer to any GTBank account, Transfers to other bank accounts etc. 

You can generate those transaction codes by making use of  GT Token hardware or GTBank USSD token.  

gtbank online baanking token photo


You can get a hardware token at any GTBank branch at a cost of N2,100 (VAT exclusive) OR dial *737*7# for a USSD token. Each USSD session costs N10 OR via GTCONNECT (cost to be borne by customer) for NRN customers.


Do you use GTBank internet banking? Feel free to share your experience. 


Saturday 30 July 2016

Instead of adding an email subscription form that takes alot of space on your blog sidebar, you can simply add a click to action button that will pop up the email subscription form when anyone clicks on it.

Really?

Yes, it is possible with the help of MailMunch "popover" form type for email marketing.

Below is what the pop up button looks like on my blog's sidebar :

pop up button for email marketing


If you click on it, it will pop up the feedburner email subscription form as seen below :


So, How Do I Add The Pop Up Button To My Blog?


You will have to create a popover form type at MailMunch.co before you can implement this on your blog.

So, if you haven't, check my tutorial on how to create a pop up email subscription form.

If you've created the pop up form, sign in to MailMunch.co dashboard, click on your site, and while on the "Forms" page, click on "edit" next to the popover form type you want to use.

Click on the "Integrate" tab, then click on the "Publish form" tab

You will see your popover form code as highlighted in the screenshot below:

mailmunch pop up code


It should look something like #mailmunch-pop-XXXX.

You will make use of it in the sample code below :

<center>
<span style="font-weight:bold;">Want Us To Send Latest Updates To Your eMail Inbox?</span><br /><a class="myButton" href="#mailmunch-pop-XXXXXX">Click Here</a>
</center>

<style type="text/css">
.myButton {
-moz-box-shadow:inset 0px 39px 0px -24px #e67a73;
-webkit-box-shadow:inset 0px 39px 0px -24px #e67a73;
box-shadow:inset 0px 39px 0px -24px #e67a73;
background-color:#e4685d;
-moz-border-radius:4px;
-webkit-border-radius:4px;
border-radius:4px;
border:1px solid #ffffff;
display:inline-block;
cursor:pointer;
color:#ffffff;
font-family:Arial;
font-size:19px;
font-weight:bold;
padding:12px 37px;
text-decoration:none;
text-shadow:0px 1px 0px #b23e35;
}
.myButton:hover {
background-color:#eb675e;
}
.myButton:active {
position:relative;
top:1px;
}

</style>


All you need to do is to edit the code above by replacing the XXXXX with the digits in your popover form code.

You can check out the video tutorial at : https://www.youtube.com/watch?v=2Ijzk9gG3YM


When you're done, copy and paste the edited code above in "HTML/Javascript" gadget of a Blogger blog or "Text" widget of a Wordpress blog.

For Blogger, go to "Layout" > "Add a Gadget" and select "HTML/Javascript".

For WordPress, go to "Appearance" > "Widgets". Drag the "Text" widget to the sidebar and paste the code in it.

For Blogger users, you can also make it to display on mobile view of your blog. Read: How To Make Any Gadget Display On Blogger Mobile View.

Later on my YouTube channel, I will share a video tutorial on how to create a link like this, that pops up the email subscription form. So, ensure you subscribe to my channel here.

Let me know if this works for you.


Friday 29 July 2016

The Gionee M5 Plus is not just a new addition to the Gionee Family; it is an ingenious plus to the world of smartphones. Get ready to be blown away by the features of the new Gionee M5 Plus.

Let’s take a peek into what the M5 Plus has got to offer :

Specifications of Gionee M5 Plus  


  • 5,000mAh Battery
  • 6.0 Inch full HD Amoled Display
  • 64GB ROM expandable to 128GB
  • 3GB RAM
  • 13 MP rear camera and 5MP front camera
  • Octa Core Processor 1.3GHZ
  • GSM /WCDMA/CDMA Network
  • Andriod 5.1, G- Sensor, Light Sensor, E-Compass
  • Dual Micro Sim capabilities

Now, to the box.

I can’t wait, are you as excited as I am?


There is a seal, a strong one at that.


Alas! Here we have our Gionee M5 Plus box,


Feels good and solid, doesn’t it?

I think it’s high time we opened our box


And here’s the much anticipated GIONEE M5 PLUS PHONE.


Wow! Look at what we have.


This logo looks like a smiley right? Then it means this phone will make you smile.

Ok, on a more serious note, Gionee was created to make smiles hence, the logo.

We have our warranty card, manuals, screen protector, transparent back case, charger, USB type C cable, ear piece, ejector pin and…


Oh! This has to be the most beautiful pouch yet.


Now back to the Gionee phone, Symmetric curved design and 8.4mm slim body.


More space to track fingerprint. It also unlocks phone within 0.1 seconds and has a safebox that houses contacts, calls, messages, files, pictures, etc, accessible by fingerprint.


The 3.5mm audio jack and type C, USB port


The 5MP front camera and the fingerprint sensor by the side


Centralized camera design, 13 MP with LED flash


The Speaker vent at the bottom


A pinhole for the SD card on the right


And on the left an ejector pin hole that houses the Sim card.


6.0 inches Full AMOLED display


Oops!!! The battery is non-removable. The Gionee M5 Plus has a powerful 5020 Milli Ampere battery which means even with heavy usage, a single charge can last for as long as three days making it the perfect phone for everyday adventures.

The 3GB Ram and 64GB ROM space on the Gionee M5 Plus is simply excellent. It serves as a reliable reservoir for unending content and ensures that every application installed achieves optimum performance.

The Gionee M5 Plus is definitely a phone that delivers the best of both worlds. It is a smartphone with incredible features enjoyable for the longer period of time.


I've published a video on my YouTube channel that will show you how to check the Alexa page rank of any website. You can watch the video at : https://www.youtube.com/watch?v=1-Ou71yC924


If you check the Alexa site info of any website at Alexa.com, you will be able to see the global ranking, local ranking, top keywords from search engines, daily pageviews per visitor, bounce rate and other alexa web rankings.

With Alexa, the smaller the numerical alexa score, the better i.e the lower your ranking number, the better. The better your Alexa blog ranking, the higher Advertisers will be willing to bid to buy advertising space on your blog.

alexa blog rank


Although, alexa ranking can be inaccurate most of the time, it is still a valuable tool to have in view of search engine optimization. Want to know how to increase your blog alexa ranking? Ensure you subscribe here to this blog updates if you don't want to miss the article.


Tuesday 26 July 2016

Yesterday, I published a tutorial that explains how to integrate Mailmunch with Feedburner email subscription form. In the tutorial, I used the MailMunch "embedded" form type which lets you easily add the optin form to anywhere on your site.

Unfortunately, the "embedded" form type cannot make your opt-in form to pop up. If you want to make your form to pop up, you will have to make use of the MailMunch "popover" form type.

The "popover" form type lets you create pop up subscription forms that can pop up on page load ( when a visitor lands on your website) and on page exit (when a visitor is about to leave your website). If you set it to pop up on page load, you can further customize how long the page should wait before showing the popup. Default settings is 0 i.e no delay.

You can as well set the pop up not to display to the user on their first visit to your website. i.e the pop up will only display after their second visit to your site. More so, you can also set how many days should pass before a visitor sees the pop up form again. If you want it to be displayed only on a specific page, you can make use of MailMunch "display rules".


create a pop up subscription form for email marketing


Well, I've published a video on my YouTube channel that explains how to create pop up form. You can follow the steps in the video to create a pop up subscription form for Blogger blog or WordPress blog. Check it out at :


I hope it helps.

Below is a sample pop up form created with MailMunch and also integrates with Feedburner :

pop up email subscription form


Do you use MailMunch for your eMail marketing forms?